"To combat the stress that comes with having a busy college schedule, it is helpful to do a creative activity," says Kayla Hess.

There is nothing more invigorating than when the air loses its sharp chill and takes on a light and warm effervescence. One of my favorite activities to do in the spring is to go outside and paint on my front porch. Being in nature and expressing my creativity through painting is relaxing and reminds me to stop and breathe occasionally. Life moves too fast, and it is easy to become overwhelmed with worries and responsibilities.
To combat the stress that comes with having a busy college schedule, it is helpful to do a creative activity. In several simple steps, I will show you how to create a whimsical spring gnome painting that is worthy of being hung on your wall in your home, dorm, or even given as a gift to someone you care about.
Throughout this process, don’t fret if you think you are not artistically skilled or creative. This painting is easy to do with the clear instructions provided. The most important aspect of this craft is having fun and enjoying some time to de-stress and unwind from your busy schedule. Plus, once you are finished, you will have a cute gnome to view and be proud of.
Materials:
- No #2 Pencil
- One white 8”x10” canvas (Available at Michael’s or Hobby Lobby)
- Acrylic paintbrushes in a variety of sizes (Available at Michael’s or Hobby Lobby)
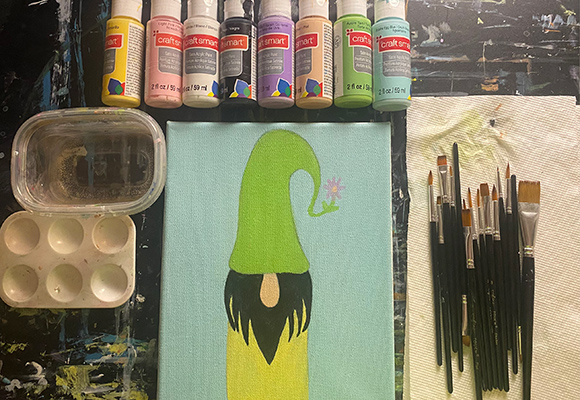
- Craft Smart Acrylic Satin Paint (Pastel or light yellow, green, purple, pink, blue, peach flesh tone, as well as black and white) (Available at Michael’s)
- Plastic cup or container for water
- Paper towels
- Newspaper (optional)
- Paint palette
Step #1: Take your 8”x10” canvas and place it on a clean table. You can put newspaper pages underneath your canvas just so you do not get the table dirty with paint.
Step #2: Paint your background color first before painting the gnome. I am using blue as my background color for my painting, but you can use any color of your choosing. Take a large brush and paint the background with vertical strokes layered on top of each other. Wait for the first coat to dry, then do one or two more as needed to ensure that there are no white spots visible on the background. Make sure to clean your brush once finished.
Step #3: Next, start drawing out your gnome lightly on the background with a #2 pencil. Begin tracing out the hat first in the center of the canvas. It will be slightly rounded at the bottom but maintain a sack like shape. The end of the hat will be slightly curved inward. Next, draw a beard and add a nose in the middle of where the brim of the hat and the top of the beard meet. For the body, you can draw a rounded rectangular shape.
Step #4: Use a variety of medium and small paintbrushes to paint your gnome. For larger details, like the hat and body, use medium brushes. For smaller details, like the nose and edges, use the small brushes. Doing this will ensure that there are crisp and clean strokes without going outside the figure and onto the background. Use any colors you wish to paint your gnome, but make the beard either white, gray, or black.
Wait until the first coat dries before going in and adding a second or third to ensure that no white spots are visible. Clean your brushes off after painting. If the water in your cup is muddy with color, dump it out and replace it with fresh water so that you will not get any cross contaminated colors in your composition.
Step #5: If you think the background is too plain, feel free to paint additional spring like details such as swirls, flowers, or grass to spruce it up.
Step #6: Throw away any used paper towels or newspaper pages. Dump the used water and clean off your brushes to remove paint residue. Let the painting completely dry before hanging or gift giving.
You now have a gorgeous whimsical gnome painting to display or give as a gift! I hope that this experience was fun and peaceful for you. Feel free to take pictures of your gnome and share this article with friends so others can experience the joy of painting.

